8.6 Connecting to a printer
By connecting a printer to the device, you can print hard copies of measurement screenshots and data saved to the internal memory or SD card.
* The printer, recording paper, and printer cable CC-42P are optional.
Connecting the device and printer with a printer cable
Use a printer cable (optional) to connect the device and printer as follows:
Important
- Note that the cable to be used differs depending on the printer.
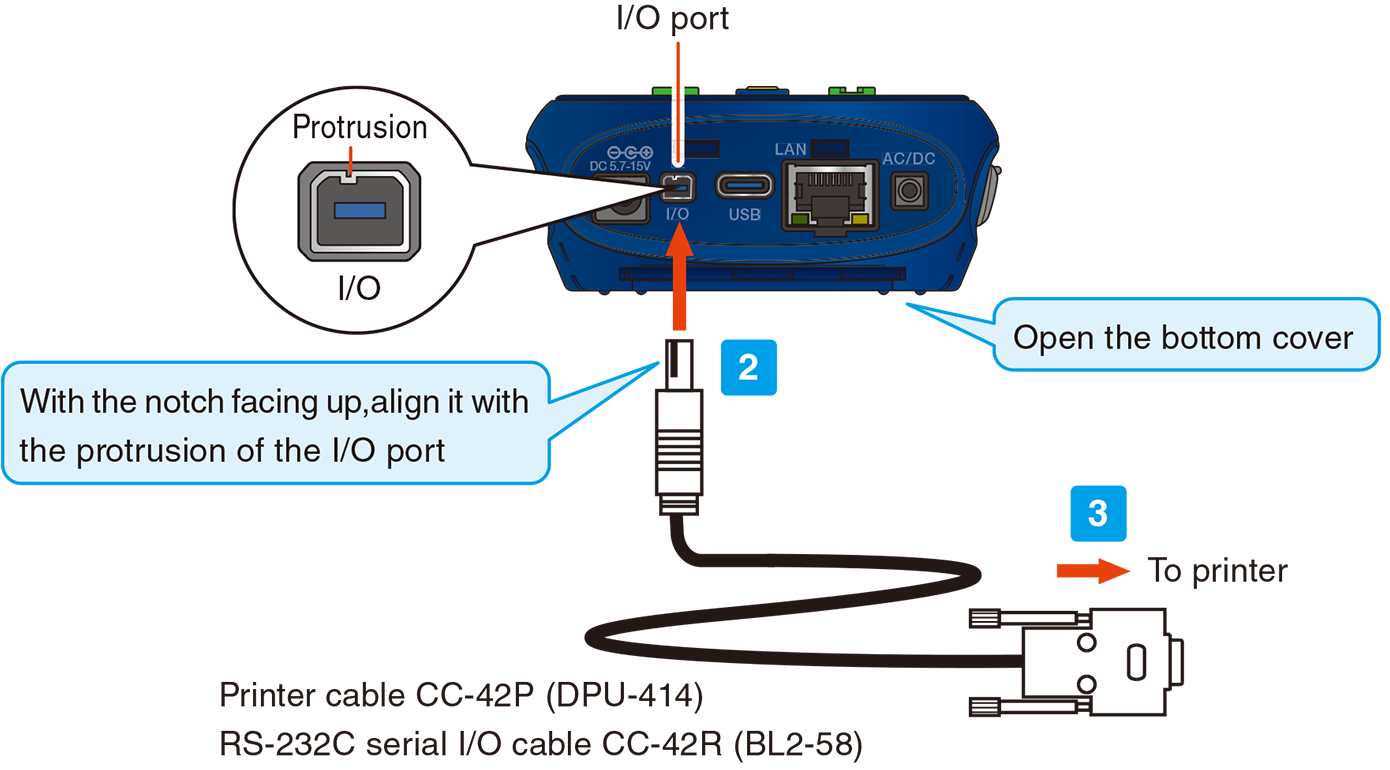
- Make sure the orientation is correct when inserting the cable into the I/O port.
1Open the bottom cover of the device.
2Insert the connector of the printer cable into the I/O port of the device.
3Plug the other end of the printer cable into the input port on the printer.
Note
- For details, refer to the instruction manual of the printer.
Setting the I/O port of the device
When using a printer (DPU-414/BL2-58), set the I/O ports of the device according to the following procedure.
1Touch [Menu] on the measurement screen.
![Touch [Menu] on the measurement screen.](../images/08/06_img_2.png)
The [Menu] screen appears.
2Touch [I/O] on the [Menu] screen.
![Touch [I/O] on the [Menu] screen.](../images/08/06_img_3.png)
The [I/O] screen appears.
3Touch [I/O Port] on the [I/O] screen.
![Touch [I/O Port] on the [I/O] screen.](../images/08/06_img_4.png)
The [I/O Port] screen appears.
4Touch [Function] on the [I/O Port] screen.
![Touch [Function] on the [I/O Port] screen.](../images/08/06_img_5.png)
5Select [Printer], and touch [Apply].
![Select [Printer], and touch [Apply].](../images/08/06_img_6.png)
6Touch [Printer Model].
![Touch [Printer Model].](../images/08/06_img_7.png)
7Select the applicable model, and touch [Apply].
![Select the applicable model, and touch [Apply].](../images/08/06_img_8.png)
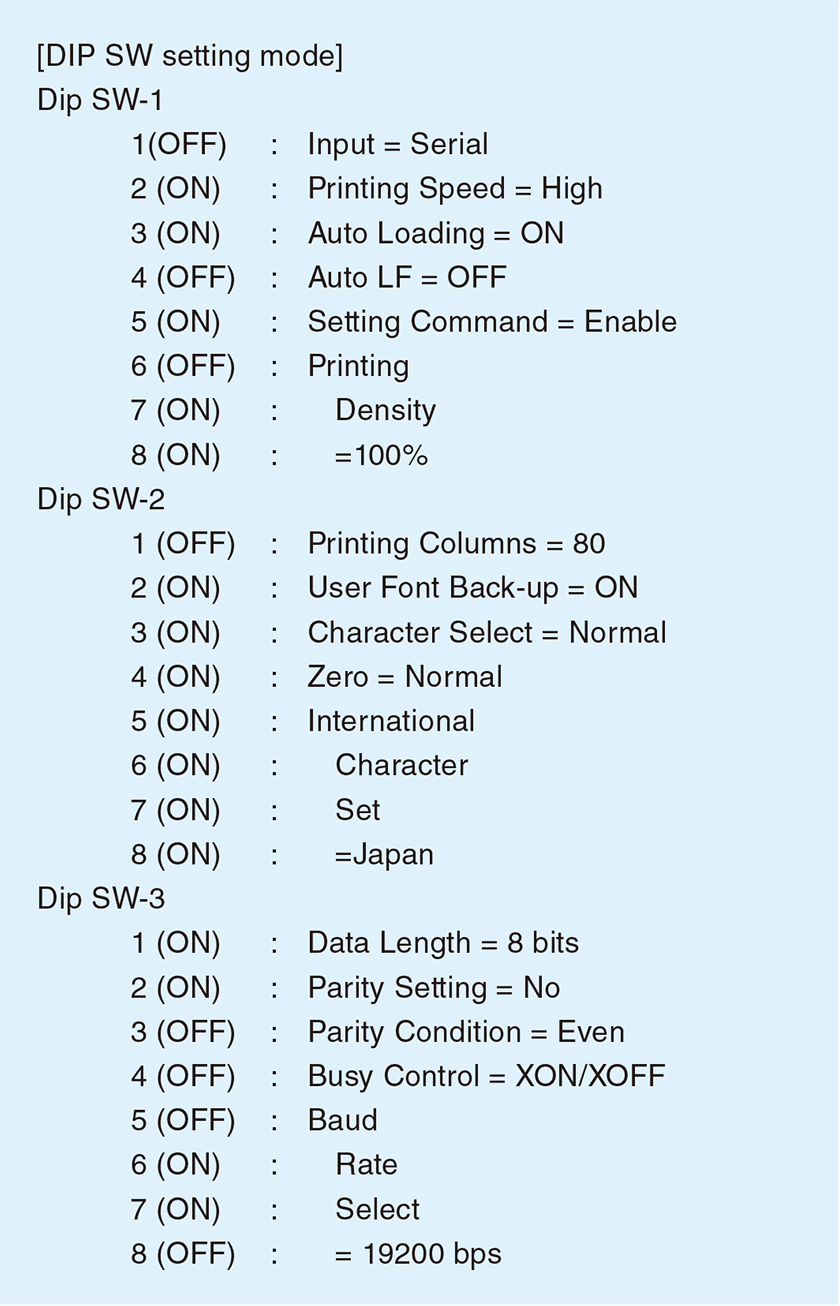
DPU-414 printer setting example
If you turn on the power while holding down the ONLINE key of the printer, the printer status will be printed.
The following is an example of what printing looks like when the soft DIP switches are set for the device (the actual printing font will be different).
Note
- For details, refer to the instruction manual of the printer.
Printing the measurement screen
1Turn on the power to the device and the printer.
2Connect the device and the printer (“Connecting to a printer”).
3Touch [>] on the menu ring, and touch [Print].
![Touch [>] on the menu ring, and touch [Print].](../images/08/06_img_9.png)
![Touch [>] on the menu ring, and touch [Print].](../images/08/06_img_10.png)
![The [Print] screen appears, and the measurement screen is printed.](../images/08/06_img_11.png)
The [Print] screen appears, and the measurement screen is printed.
Printing the saved data
Print the data saved on the internal memory or SD card.
1Touch [Menu] on the measurement screen.
![Touch [Menu] on the measurement screen.](../images/08/06_img_12.png)
The [Menu] screen appears.
2Touch [Recall] on the [Menu] screen.
![Touch [Recall] on the [Menu] screen.](../images/08/06_img_13.png)
The [Recall] screen appears.
3On the [Recall] screen, select the data you want to print.
![On the [Recall] screen, select the data you want to print.](../images/08/06_img_14.png)
1. Select the location where the data you want to print is stored.
(Example: When printing Manual (SD) data)
The data selection screen appears.
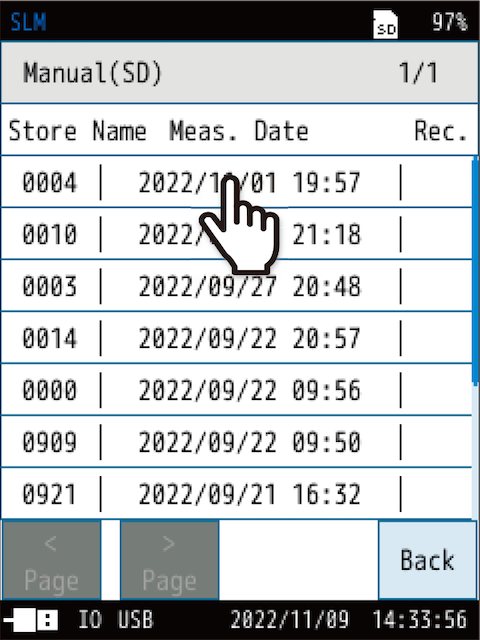
2. Select the data you want to print.
4Touch [View the data].
![Touch [View the data].](../images/08/06_img_16.png)
The saved data are displayed.
5Touch [>] on the menu ring, and touch [Print].
![Touch [>] on the menu ring, and touch [Print].](../images/08/06_img_17.png)
![Touch [>] on the menu ring, and touch [Print].](../images/08/06_img_18.png)
6Enter the [Start Address] and [End Address], and touch [Print].
![Enter the [Start Address] and [End Address], and touch [Print].](../images/08/06_img_19.png)
![The [Print] screen appears, and the saved data is printed.](../images/08/06_img_20.png)
The [Print] screen appears, and the saved data is printed.