7.1 Store operation in Manual mode
7.1.1 Saving to internal memory
Each calculated value is saved when the store operation is performed on the confirmation screen at the end of calculation.
Note
- If an SD card is not inserted, the data will be saved to the internal memory.
- If an SD card is inserted, the data will be saved to the SD card.
1Touch [Menu] on the measurement screen.
![Touch [Menu] on the measurement screen.](../images/07/01_img_1.png)
The [Menu] screen appears.
2Touch [Store] on the [Menu] screen.
![Touch [Store] on the [Menu] screen.](../images/07/01_img_2.png)
The [Store] screen appears.
3On the [Store] screen, touch [Store Mode] and select [Manual].
![On the [Store] screen, touch [Store Mode] and select [Manual].](../images/07/01_img_3.png)
4Set the store name (only when an SD card is inserted).
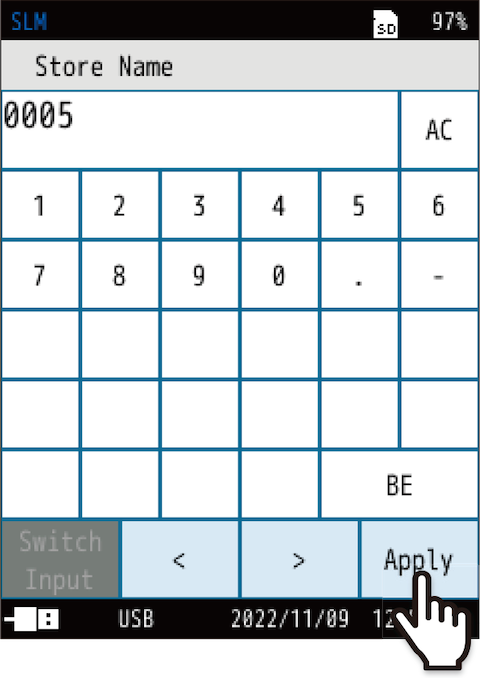
1. On the [Store] screen, touch [Store Name].
The input screen for the store name appears.
2. Enter the store name (4-digit number).
The setting range is from 0000 to 9999.
(BE: Deletes one character. AC: Deletes all entered characters.)
3. Touch [Apply].
5Select a measurement time.
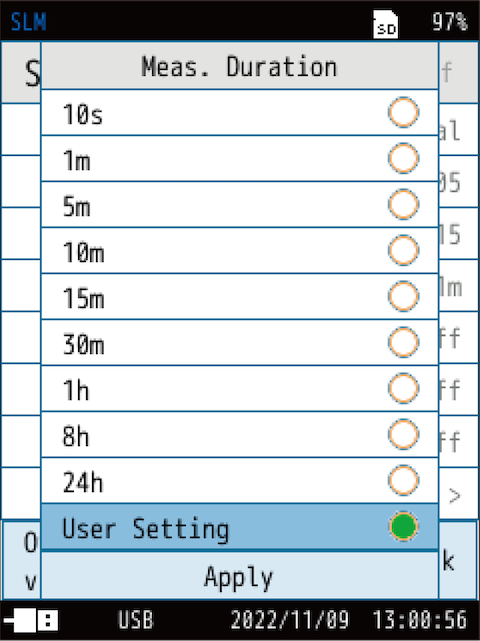
(s = seconds, m = minutes, h = hours)
1. On the [Store] screen, touch [Meas. Duration].
Select a measurement time, and touch [Apply].
2. If you select [User Setting], you can set the measurement time to a time of your choice.
The maximum time that can be set is 24 hours.
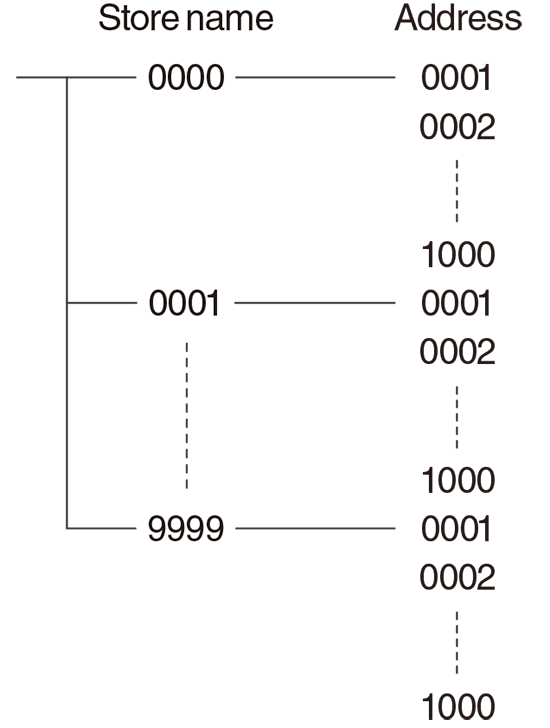
6Set the store address

1. On the [Store] screen, touch [Address].
The input screen for the store address appears.
2. Enter the store address (4-digit number).
The initial setting is 0001. If there is no problem, no change is required. Enter a store address when you want to set an address other than 0001 or when you want to avoid the address where data is saved.
The setting range is from 0001 to 1000.
(BE: Deletes one character. AC: Deletes all entered characters.)
3. Touch [Apply].
- The address is displayed on the measurement screen. When an address is displayed in red, it indicates that there is data saved to this address.
- If measurement data has already been saved, a confirmation screen will appear when starting measuring. If you select [Overwrite and measure], the data will be overwritten (the saved data will be deleted and the current data will remain).
- For whether the data is already saved, see “Loading the saved data”.
7Touch [Back] or press the START/STOP key to return to the measurement screen.
![Touch [Back] or press the START/STOP key to return to the measurement screen.](../images/07/01_img_8.png)
8Press the START/STOP key on the measurement screen to start measurement.
9Press the START/STOP key again to end the measurement.
After the measurement is completed, the confirmation screen appears.
10Touch [Save data].
![Touch [Save data].](../images/07/01_img_9.png)
The calculation result is saved.
- It takes about one second to save to the memory. After saving, the address will be increased by 1.
- The saved information includes conditions such as measurement start date and time, measurement time, frequency weighting, time weighting, the outcomes of their calculation, and OVER and UNDER information.
- The [Time-Level] screen will not be saved.
- If canceled, data can be saved from [Lp Store / Leq Store] on the menu ring(“menu ring”).
Important
- Performing the store operation saves the measurement data to the displayed address.
- Addresses displayed in red already contain saved measurement data. Be careful not to accidentally overwrite this data.
Note
- If the number of addresses with saved data is 1,000, the number of addresses will not increase anymore and 1,000 will be displayed in red.
If you want to continue measuring and saving data, change the store name (“4. Set the store name (only when an SD card is inserted).”).
7.1.2 Loading the saved data
Load the data saved to the internal memory in Manual mode.
1Touch [Menu] on the measurement screen.
![Touch [Menu] on the measurement screen.](../images/07/01_img_10.png)
The [Menu] screen appears.
2Touch [Recall] on the [Menu] screen.
![Touch [Recall] on the [Menu] screen.](../images/07/01_img_11.png)
The [Recall] screen appears.
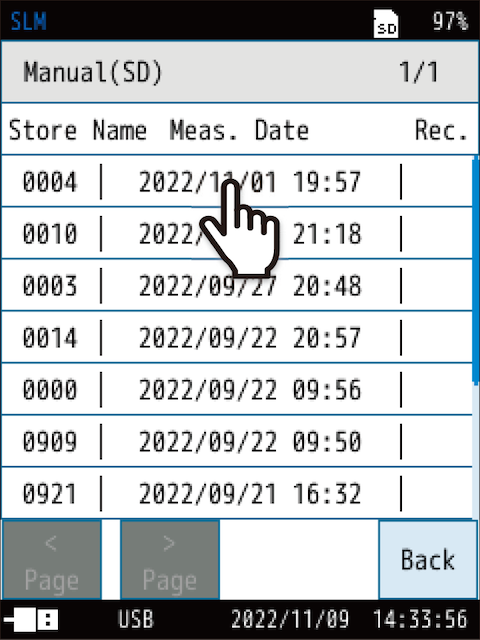
3Select the location to which to save data from the [Recall] screen.
![Select the location to which to save data from the [Recall] screen.](../images/07/01_img_12.png)
A list of saved data is displayed.
Note
- If no SD card is inserted, you can only select [Manual (Internal)].
4Touch the data to read.
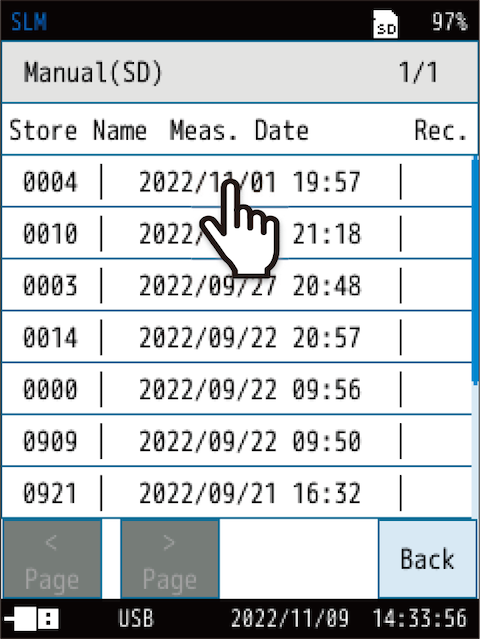
- The data is listed by store name.
- [Meas. Date] is the date and time the measuring was started for the first address measured with the same store name.
- [Meas. Date] will not change even if the number of store addresses increases.
5Touch [View the data].
![Touch [View the data].](../images/07/01_img_14.png)
The data appears.
Each calculated value of the store address is displayed.
You can change the address with [- Prev.] or [+ Next] on the menu ring.
![Each calculated value of the store address is displayed. You can change the address with [- Prev.] or [+ Next] on the menu ring.](../images/07/01_img_15.png)
![]()
![Each calculated value of the store address is displayed. You can change the address with [- Prev.] or [+ Next] on the menu ring.](../images/07/01_img_16.png)
If there are six or more calculated values, on the menu ring, touch [>] and then touch [Disp] to switch to the next screen after the calculated values screen.
![If there are six or more calculated values, on the menu ring, touch [>] and then touch [Disp] to switch to the next screen after the calculated values screen.](../images/07/01_img_17.png)
![]()
![If there are six or more calculated values, on the menu ring, touch [>] and then touch [Disp] to switch to the next screen after the calculated values screen.](../images/07/01_img_18.png)
- Touch [Menu] to check the measurement and store settings.
- You can save a screenshot or print from the menu ring.
7.1.3 Deleting the saved data
Delete the data saved to the internal memory in Manual mode.
Note
- When deleting data, it is deleted on a store name basis. You cannot delete data for each address.
1Touch [Menu] on the measurement screen.
![Touch [Menu] on the measurement screen.](../images/07/01_img_19.png)
The [Menu] screen appears.
2Touch [Recall] on the [Menu] screen.
![Touch [Recall] on the [Menu] screen.](../images/07/01_img_20.png)
The [Recall] screen appears.
3Select the location to which to save data from the [Recall] screen.
![Select the location to which to save data from the [Recall] screen.](../images/07/01_img_21.png)
A list of saved data is displayed.
Note
- If no SD card is inserted, you can only select [Manual (Internal)].
4Touch the data to delete.
5Touch [Delete the data].
![Touch [Delete the data].](../images/07/01_img_23.png)
The data will be deleted.
7.1.4 Copying data from the internal memory to the SD card
Copy the data saved on the internal memory to the SD card.
1Touch [Menu] on the measurement screen.
![Touch [Menu] on the measurement screen.](../images/07/01_img_24.png)
The [Menu] screen appears.
2Touch [Recall] on the [Menu] screen.
![Touch [Recall] on the [Menu] screen.](../images/07/01_img_25.png)
The [Recall] screen appears.
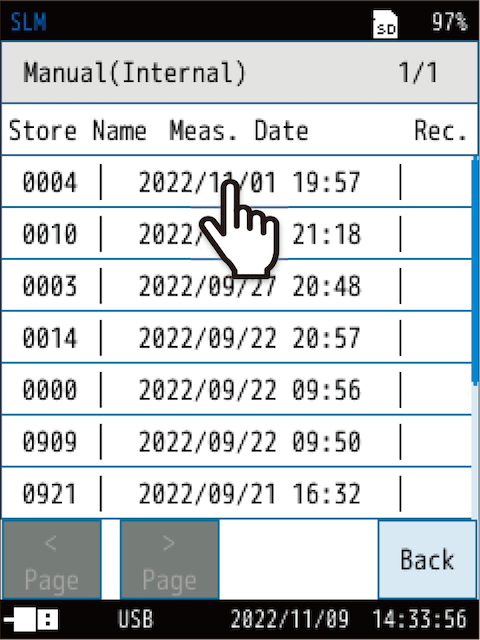
3Touch [Manual (Internal)].
![Touch [Manual (Internal)].](../images/07/01_img_26.png)
A list of saved data is displayed.
4Touch the data to copy.
5Touch [Copy to the Card].
![Touch [Copy to the Card].](../images/07/01_img_28.png)
The store name entry screen for the copy destination appears.
6On the store name entry screen for the copy destination, enter the store name (4-digit number), and touch [Apply].
![On the store name entry screen for the copy destination, enter the store name (4-digit number), and touch [Apply].](../images/07/01_img_29.png)
The setting range is from 0000 to 9999.
(BE: Deletes one character. AC: Deletes all entered characters.)
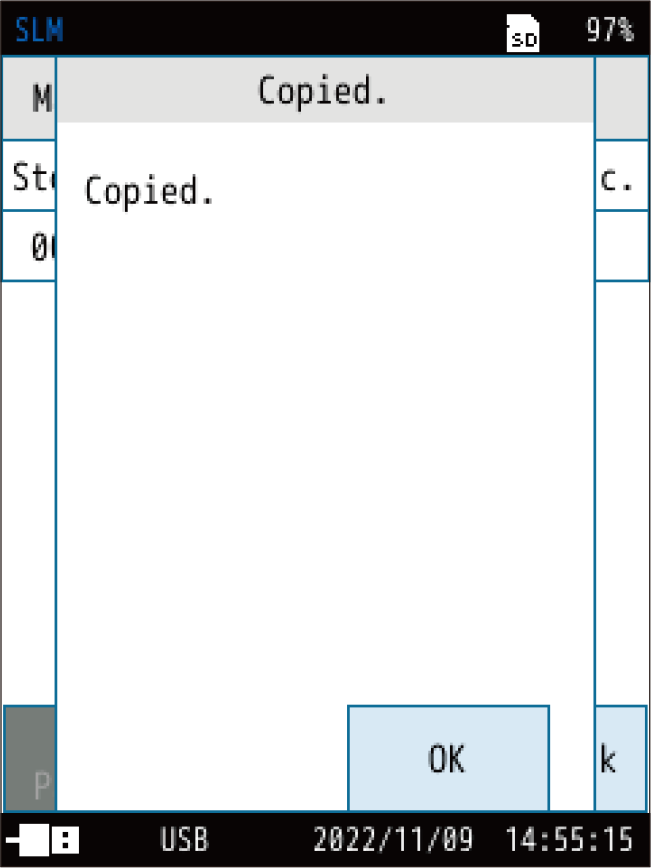
Data is copied from the internal memory to the SD card.